Digitally signing emails – Outlook 2019 (MacOS)
These instructions describe how to digitally sign one or more email messages.
Requirements
Note that before you can sign your emails, you must set up Outlook for your personal certificate.
Sending digitally signed emails
- Click "Email".

- Click the "Options" tab.
- Click "Security".
- Once you have clicked "Security", a drop-down menu will appear in which you can select "Digitally Sign Message".

- Once you have selected "Digitally Sign Message", a message will appear saying that you have chosen to sign messages digitally.
-
Write an email and send as usual.
Note that when you digitally sign a message, it doesn't mean that the message is protected from being intercepted and read, but only that you have sent the message and that it hasn't been altered along the way. To ensure that only the recipient can read your message, you must also encrypt the message.
Digitally signing all sent emails
If you want all of the messages you send to be digitally signed:
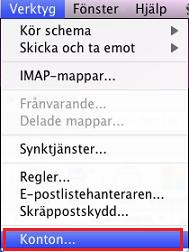
- Click on the "Tools" menu and select "Accounts".
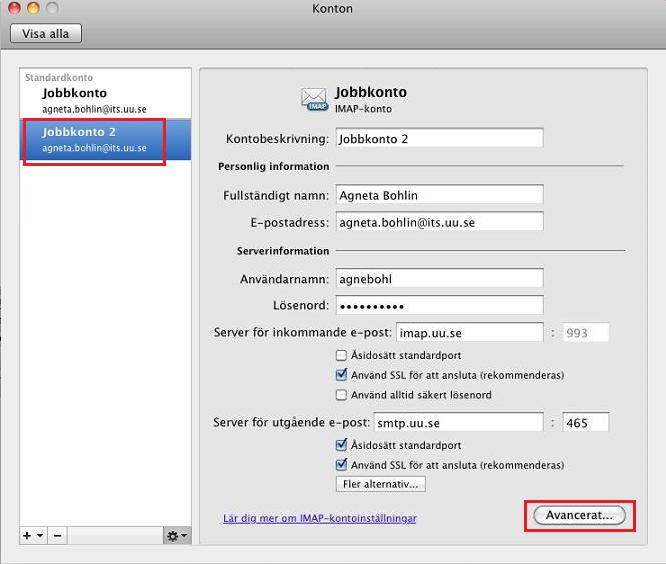
- Select the account you want to add the function to.
- Click "Advanced".
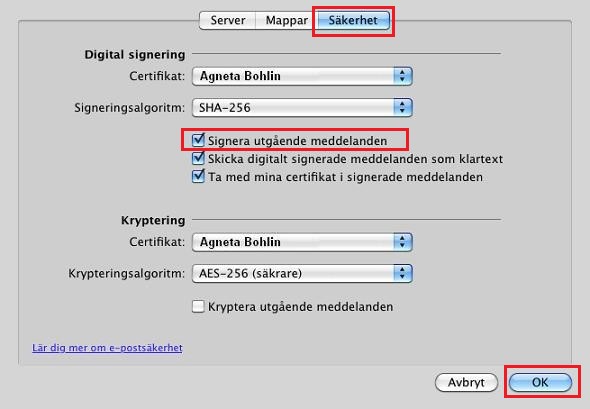
- Select "Security".
- Tick the box for "Add digital signature to outgoing messages".
- Click "OK".
- Close the next window.
______________________________________
Do you have any questions? Contact IT Support.