The Diskus Guide
Here are several step-by-step guides for the basics of Diskus. There are often many different ways of doing things in Diskus. The recommended way is described here.
Screen publishing via Diskus - overview
Below are the general steps necessary for screen publishing. Detailed descriptions of the different steps are provided further down on this page.
- Create the image(s) you want to be displayed on the screen. The easiest way is to create images (e.g., in jpeg format) in PowerPoint using the provided templates. Download templates.
- Create a layout. Go into Diskus and create a layout, to which you add one or more images. Set the length of time for which each image is displayed. See section: How do I create a layout?
- Create a campaign. Create a campaign in Diskus and add one or more layouts to the campaign. This part is optional. See section: How do I create a campaign?
- Publish your layout/campaign. Schedule an event in Diskus and add your campaign or layout. Schedule your event on the correct screen group. See section: How do I publish/schedule a new layout or campaign?
What is the difference between a layout and a campaign?
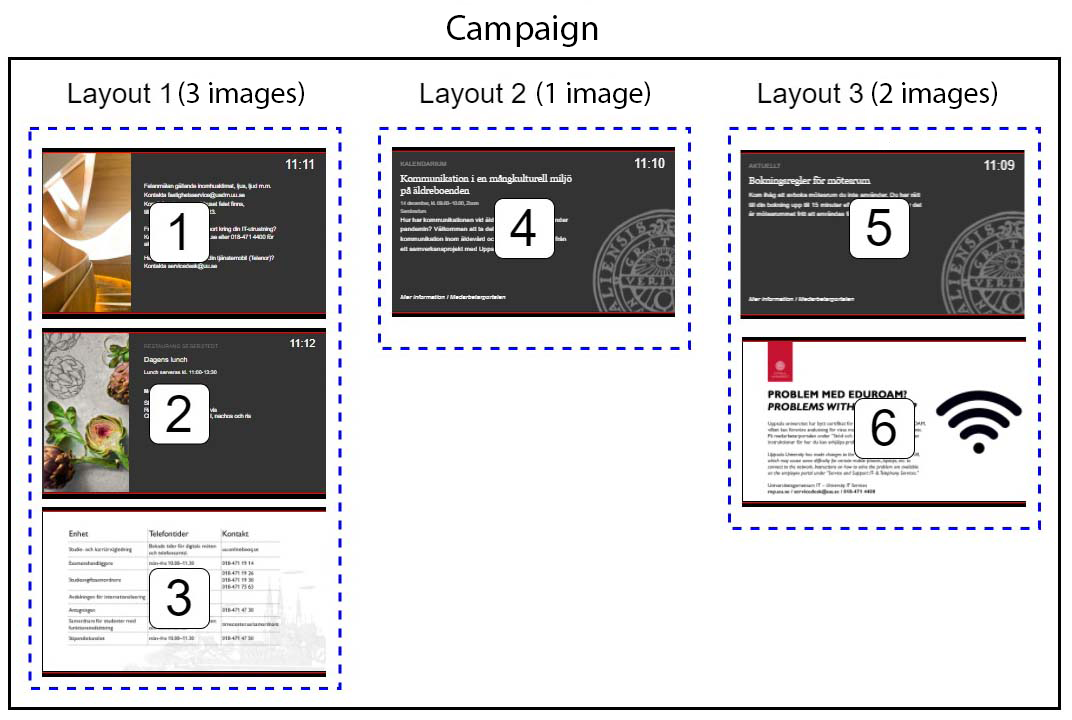
The figure below shows a campaign with three layouts, containing a total of six images. If each image is up for 15 seconds, this results in a ninety-second slide show (15 seconds x 6 images).
Image
- An image in this sense is simply the content of the screen at a given moment. However, the term image is not used in Diskus.
- An image can be designed in Diskus but we recommend that it is made using one of the ready-made PowerPoint templates available for screen publishing. By using the templates, we ensure University-wide uniformity. After you have made your image in PowerPoint, save it in a suitable image format (e.g. jpeg) and upload it to Diskus. Images are most easily uploaded in the process of creating a layout.
- Each image should be designed to be easy to read, should have a clear message originator and should conform with UU’s graphic profile. See advice and guidelines for screen publishing.
- The images are put together in a layout that is then either published or made part of a campaign to be published.
Layout
- A layout contains one or more images that are displayed in a specific order.
- You can specify the duration of each image on the screen before it switches to the next image. See advice and guidelines for screen publishing.
- A layout can be scheduled as a standalone or as part of one or more campaigns.
Campaign
- A campaign contains one or more layouts that appear in a specific order.
- It is not necessary to use a campaign - you can publish the layout directly. However, we recommend using a campaign.
- You can easily add or take away layouts in a campaign.
Event
- An event is a scheduled campaign or layout. The event can be selected for constant display (always) or to have a start and end date (custom).
- Several events can be scheduled for the same day.
- An event can be published on one or more screen groups.
How do I create a layout?
There are several ways to create a layout. Here we describe the simplest approach and the one we recommend.
- Go to Layouts in the left-hand menu.
- Click the green Add layout button in the top right corner. Give the layout a name following the common naming standard (see section on naming standard).
- Add a description under description. Click Save.
- You now enter the design mode, where you can design images (we recommend that you do not design your image here, but that you upload finished images that are best created using the ready-made templates available).
- Upload image(s) by double-clicking on the large grey box in the middle and selecting Image from the left-hand menu. In the dialogue box that appears, click the green Add files button and find the image(s) you want to upload. Then click Start upload. When the upload is complete, click Done. See Figure 2.
- Your images now arrange themselves in the order (top to bottom) that they will appear in your slideshow, in what is called the Region timeline. You can change their order by clicking and dragging with your mouse. See Figure 3.
- Set how long the image is displayed: Press Edit and select how long the image will be displayed by entering a number of seconds under Duration. Read guidelines on how long an image should be displayed.
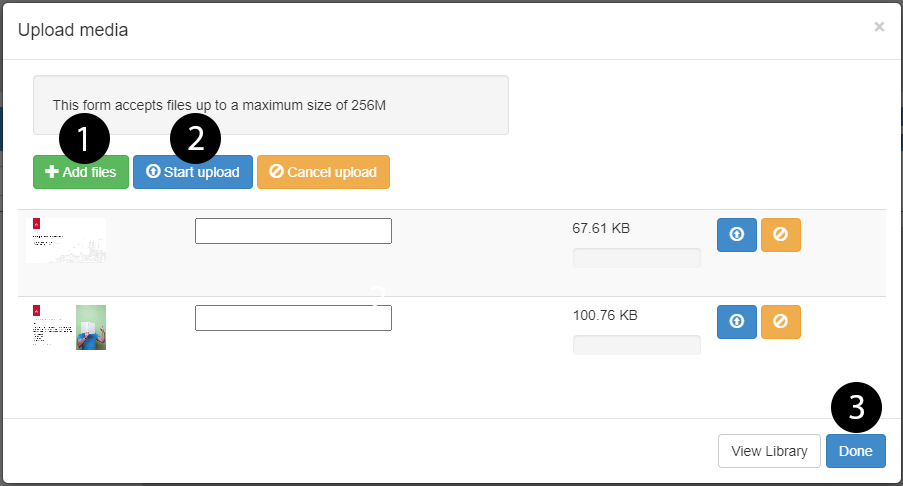
Figure 2. Uploading images to the layout.
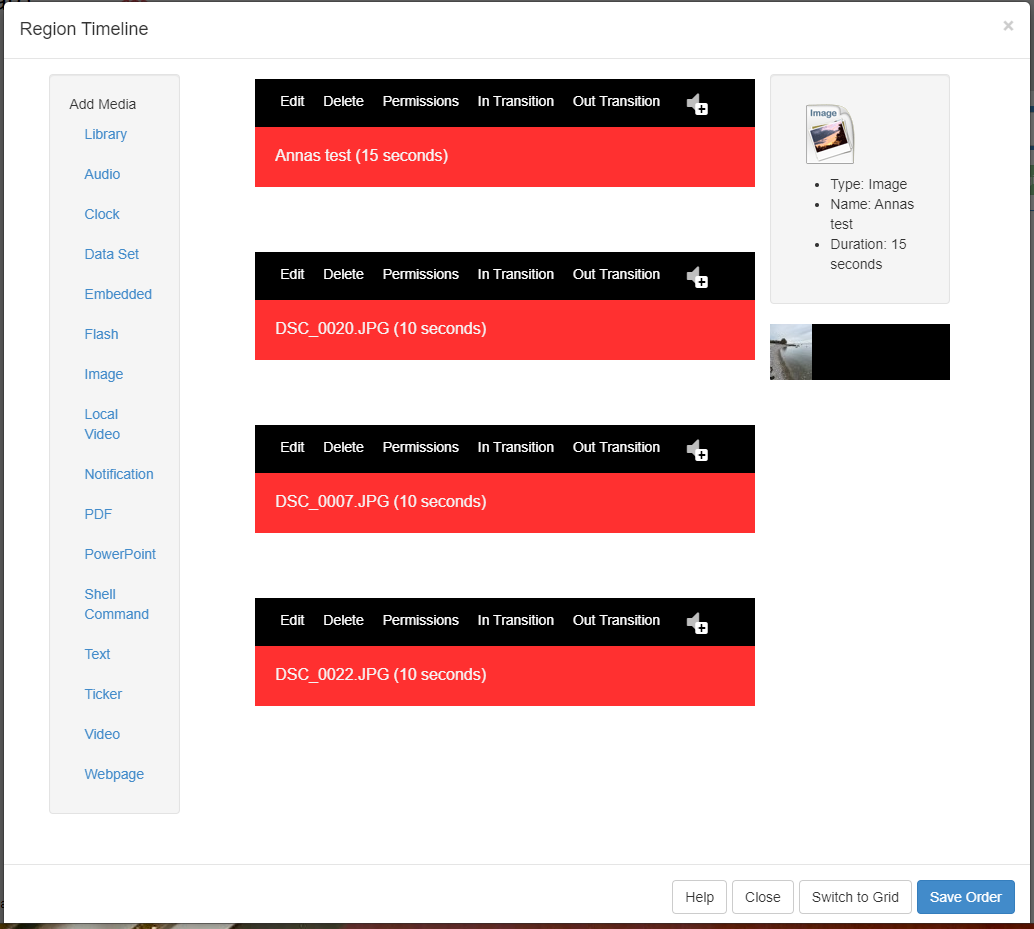
Figure 3. Sorting and overview of layouts.
How do I create a campaign?
- Go to Campaigns in the left-hand menu.
- Click the green Add Campaign button.
- Name your campaign. Follow the naming standards and add tags if you wish.
- Find your newly created campaign in the list and click the rightmost arrow, select Layouts.
- Select the layouts you want to include in your campaign by clicking the blue plus sign to the right of each layout. The layouts line up at the top. See Figure xx.
- Click and drag the layouts if you want to change their order. See Figure xx.
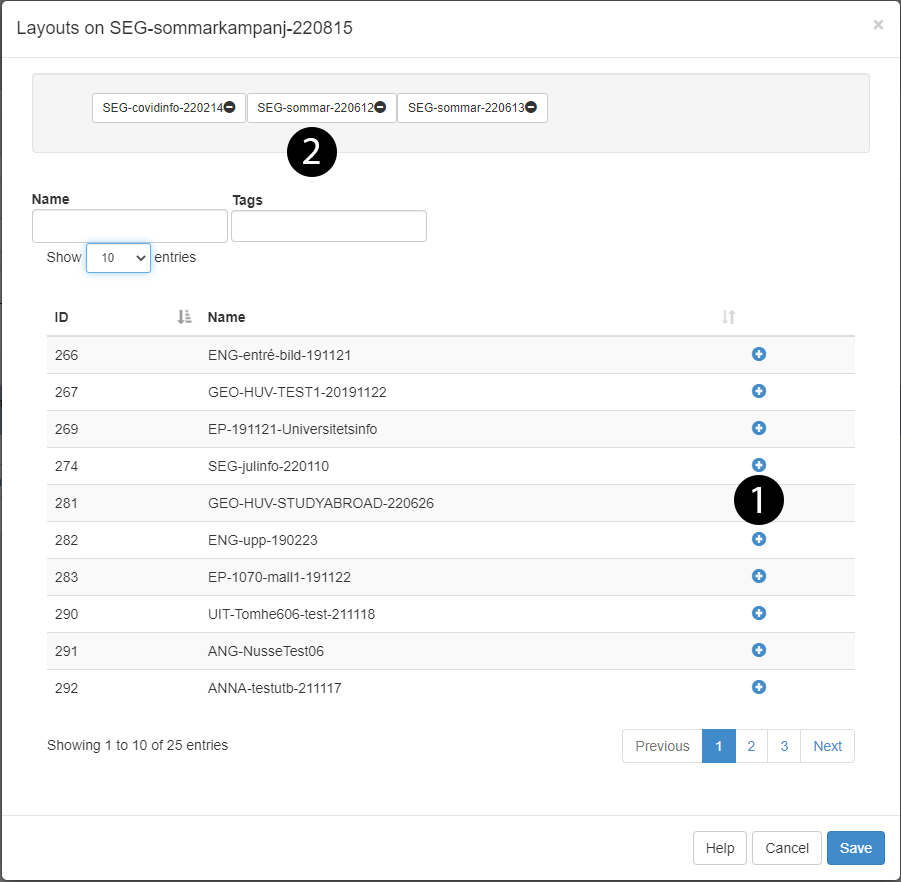
Figure 4. Add and remove layouts in a campaign.
How do I publish/schedule a new layout or campaign?
- Go to Schedule in the left-hand menu.
- In the calendar, you can see what has already been published on the screens by selecting the relevant screen group under Select displays.
- Click the green Add event button and fill in the dialogue box as follows (see Figure 5):
- Event type: Select Campaign/Layout
- Display: the screen group where you wish to publish.
- Dayparting: Choose a specific time interval (custom) or whether it should constantly be up (always). If you have created your own time interval under dayparting in the left-hand menu (e.g., if the lunch menu should only be displayed before lunch), then those options will also appear here. See section 1.7 for instructions on how to make a publication during only part of the day.
- Select the layout or campaign you want to publish under Display Order.
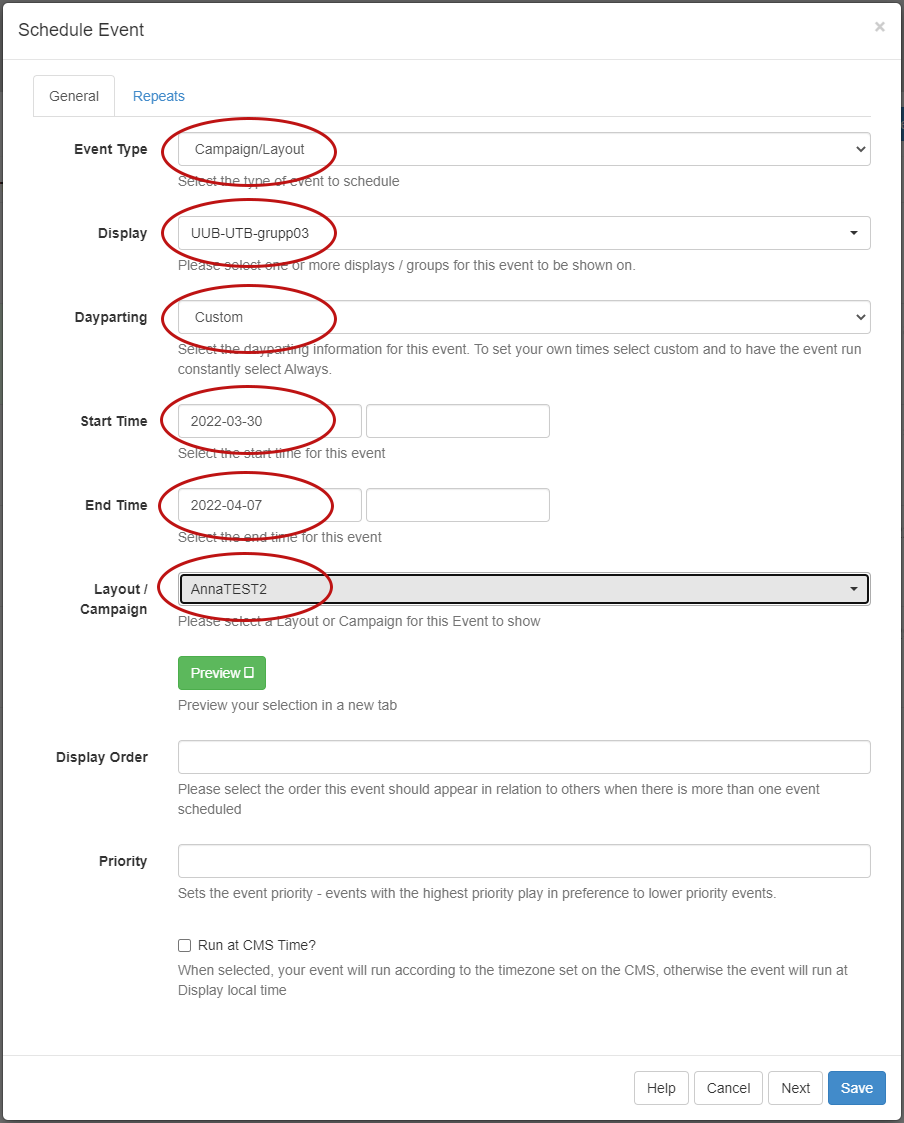
Figure 5. Publish/schedule layout/campaign.
How do I add/remove a layout in an existing campaign?
- Go to Campaigns in the left-hand menu.
- Go to the rightmost arrow of the current campaign and select Layouts.
- Click the blue plus sign for the layout you want to add to the list of available layouts (see No 1 in Figure 4). Now, your layout has been added to the campaign's selected layouts at the top (see No 2 in Figure 4). Change their order by clicking and dragging. To delete a layout, press the minus sign of the relevant layout.
- Click Save.
- To preview your campaign, select Preview campaign from the list above the campaigns.
How do I change an existing layout?
- Select Layouts in the left-hand menu
- Go to the rightmost arrow of the current layout and select Design from the menu.
- Double-click on the image to go to the Region Timeline (see Figure 3). Here you can see all the images included in your layout in chronological order from top down.
- To change the order. Use click and drag.
- To change the duration. Press Edit and change the number of seconds in Duration.
- To delete an image. Click Delete.
How do I add an image/layout that will only be displayed for part of the day, e.g. the lunch menu?
First, create a Daypart containing information about the relevant time period. Then you choose your daypart in your event.
- Select Dayparting from the left-hand menu.
- Click on the green Add Daypart button.
- Enter a name and the times between which you want it to appear. See Figure 6.
- Select your daypart under Dayparting when scheduling. See Figure 7. Set the start date. If you want your daypart to appear for several days, enter these settings in the Repeats tab. If you choose Priority 1, already appearing layouts/campaigns will be disregarded so that it alone is displayed.
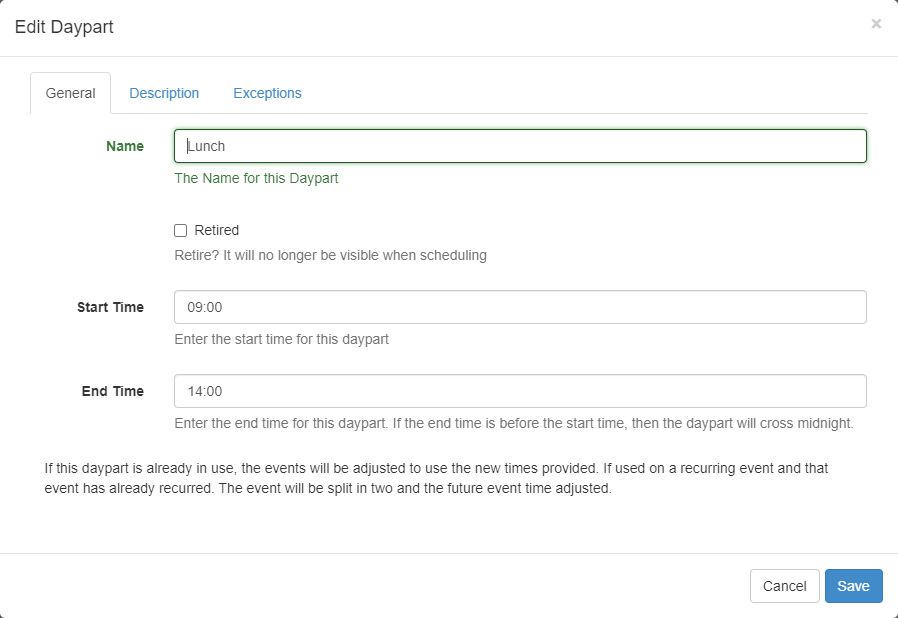
Figure 6. Show a picture for part of the day, e.g., the lunch menu (step 1).
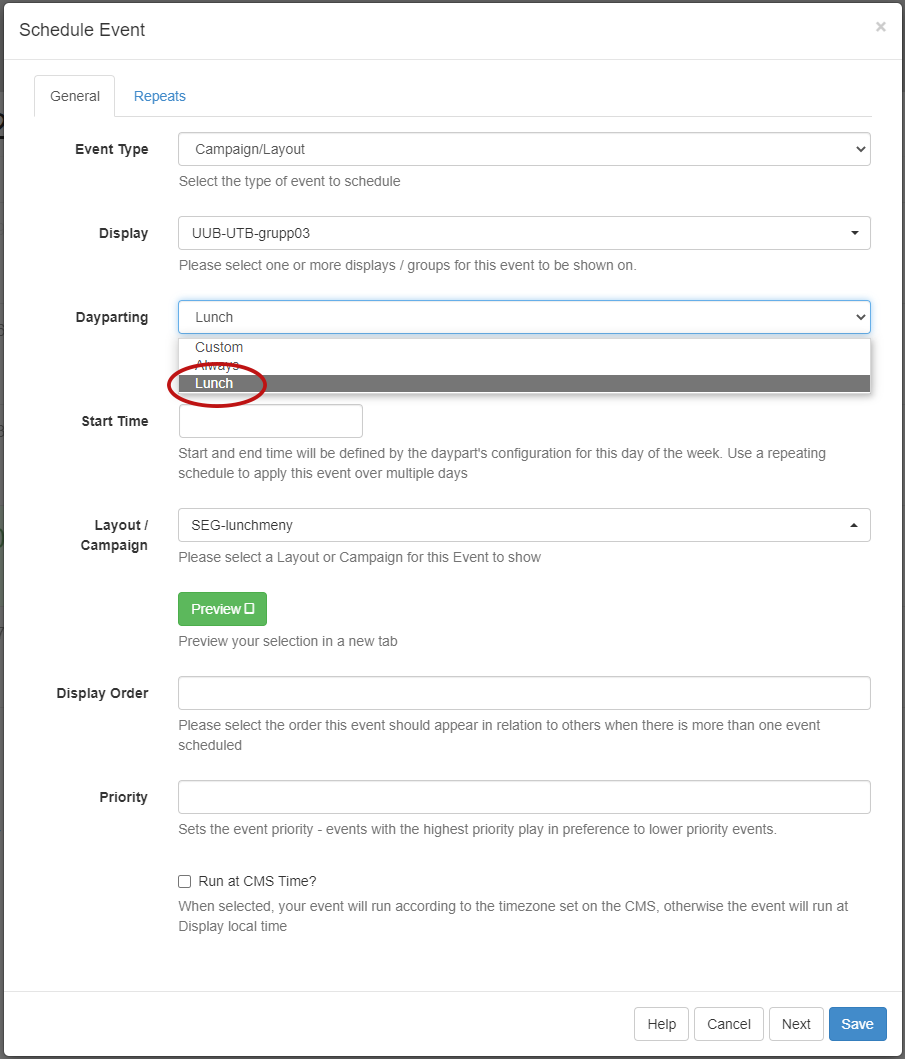
Figure 7. Show a picture for part of the day, e.g., the lunch menu (step 2).
How do I publish/schedule the layout/campaign at recurring intervals, e.g., every Thursday?
When scheduling an event, go to the Repeats tab and select the interval at which you want to publish your layout/campaign. In the sample figure, the event is to be shown every Thursday. See Figure 8.
Note! The repetition must not be shorter than the length of the layout.
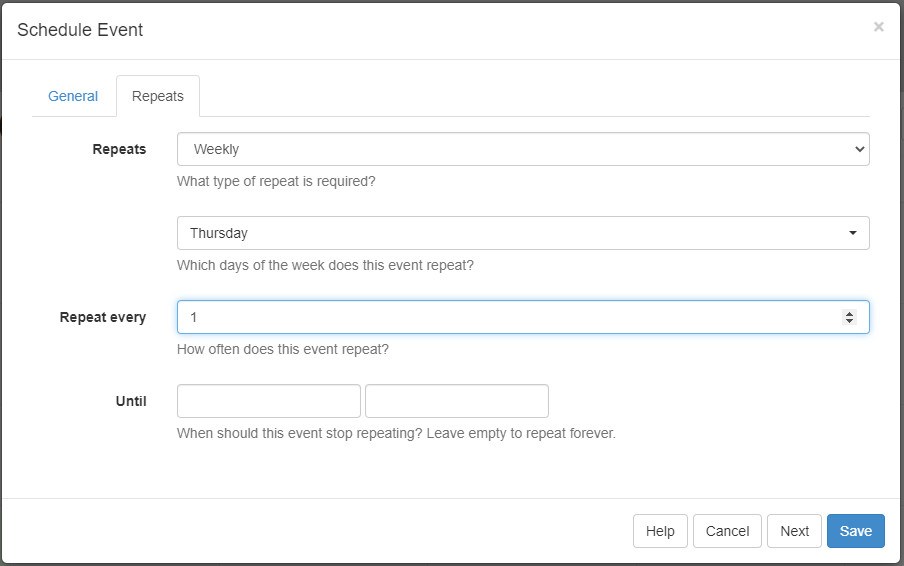
Figure 8. Publish/schedule layout/campaign at recurring intervals.
How do I change how long an image is displayed?
See question: How do I change an existing layout?
Follow the name standard in order to easily find your layout again
- Name your layout/campaign in a standardised way. Use the campus prefix, description, date of removal as well as any other optional information. An example is SEG-covid-220422
- Fill in the description to make it easier for you and others to remember and know what the layout/campaign contains.
How do I set the dates between which my layout/campaign will appear on the screen?
Set the date range when scheduling your event or in an already scheduled layout/campaign.
In an already scheduled layout/campaign:
- Go to Schedule in the left-hand menu.
- Ensure the correct screen group is selected.
- Click on your event in the schedule.
- Change the Start Time and End Time in the dialogue box.
How does priority work?
The order of priority is in descending order. A higher priority always overrides a lower one, which you must keep in mind when scheduling.
Normally, priority does not need to be used, but there may be occasions when it is appropriate. When applying the order of priority, it is important to know and follow the existing guidelines:
- Priority 0 is the default and thus cedes to any other layout/campaign given higher priority.
- Priorities 1 - 3 are permissible for local editors to use.
- Priorities 4 - 6 are for important central information.
- Priorities 7 - 9 are for use by the Security and safety division only.
How do I create an image (e.g., jpeg) in PowerPoint?
- Go to the template page and download the template you will use. The most common is the landscape template for Windows. Templates are also available for portrait format as well as for macOS.
- Fill the template with your content.
- Go to Arkiv in the top left corner, select Exportera.
- Select Ändra filtyp and then JPEG, as shown in Figure 9. Click Spara som and save the image to the appropriate location. See Figure 9.
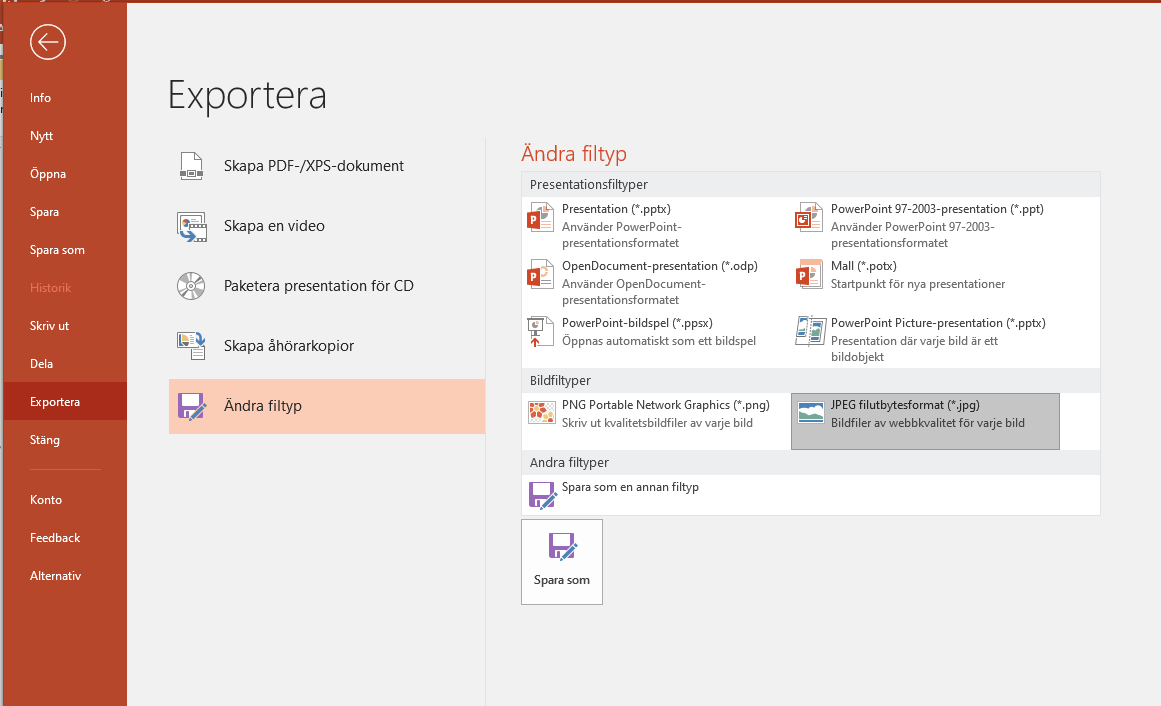
Figure 9. Create a jpeg image from a PowerPoint image.